 We have a number of environments that we work with and we move data from one environment to another using both the generally available and highly customized Release Manager and, of course, the Content Porter. This post is about what we’ve found that works best in this scenario, and helps us to ensure that the release happens as smoothly as possible.
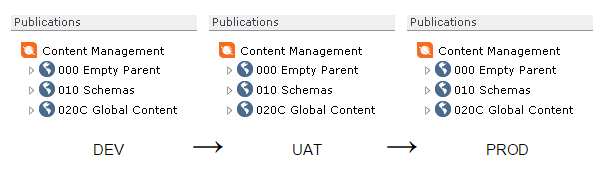 Like many installations, our customer has three main environments that we work in: DEV, UAT, and PROD, and we are working on many releases at any one time. We do all of the development work in DEV and, while we are doing it, use the Release Manager to add each item to an appropriate release. When it’s time to move to UAT, we Export the release in to an XML file, open it in Content Porter, export the package from DEV, and import it in to UAT.
At any one time we have multiple people, across multiple teams, working with multiple releases. Our goal, in every release, is to ensure that the release information is moved, as accurately as possible, from one environment to the next.
Note: Every step that follows is important. The goal is to get the data, as accurately as possible, from one environment to another. If you have a bad export then you can not make it better during the import.
Note: Our releases contain many items but specifically do not include schemas, folders, structure groups, categories, or keywords. We move all of these manually, since the process to confirm them is much more labour intensive.
With that, our releases generally have the following steps:
- Add items to the release / Update the release notes
- Export the release / Update the release notes
- Create or update any schemas, folders, structure groups, categories, and keywords, based on reviewing the release notes and on comparing the two environments.
- Import the release, one level at a time.
- Publish a small set of clients
- Verify that set of clients
- Publish all clients
Of all of these, the two most problematic steps are exporting content and importing content.
Exporting Content in a release
Export the entire release from the Release Manager and store it in an XML file that has the same name as the release. This will make it easier to find the release and will make the release notes more simple.
| Open the Content Porter and load the XML file | 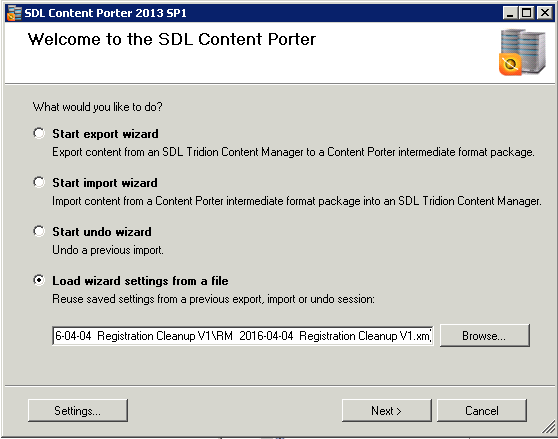 |
| Log in to the correct server | 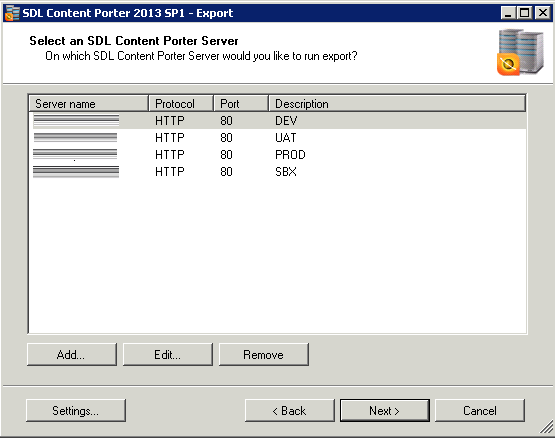 |
| Clear the Dependency Type GroupsNo Dependency Type Groups are required for the release. These cause the Content Porter to find and include related items. We chose all of the items that we need by adding them in the Release Manager. | 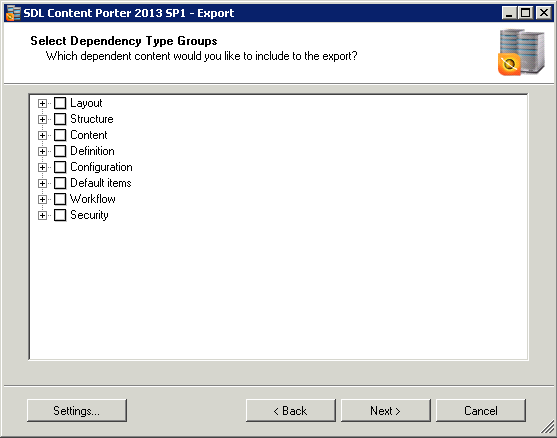 |
| Don’t change anything with the selected items. We want a single export of all items, in all levels, that are specified in the release. | 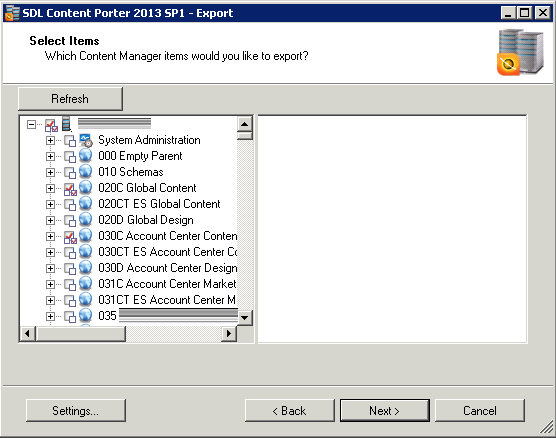 |
| We turn off the Experience Manager and the Translation Manager. In our environment this is acceptable. Your environment may dictate otherwise. | 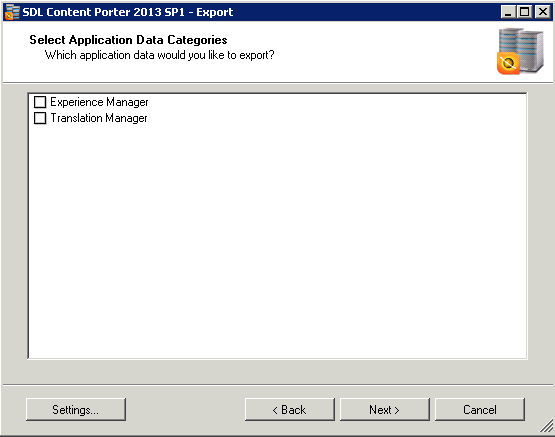 |
| Indicate where the export package will be saved. We use the release name as the base name. All files are stored in a folder with that name. The export is that name.zip. The pack is that name.zip. This makes it easier for us to work with and it makes errors much more obvious. If your release is at 3am then you don’t want to have to search too far. | 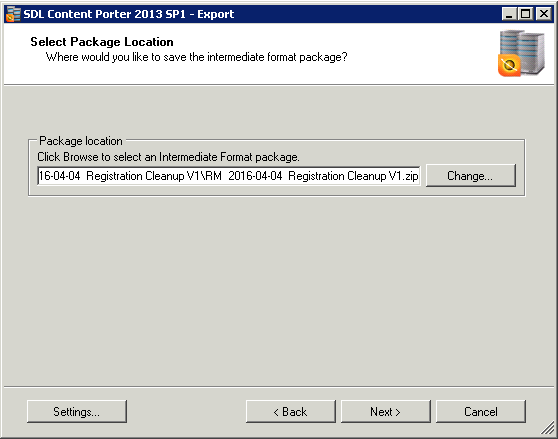 |
|
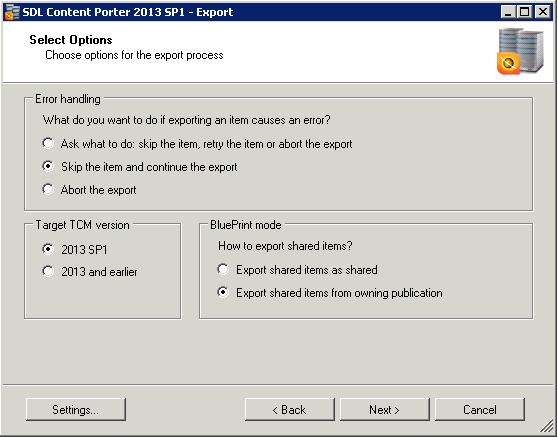 |
| Complete the export. You should not have any errors. Diagnosing and resolving errors will be the subject of other posts. | 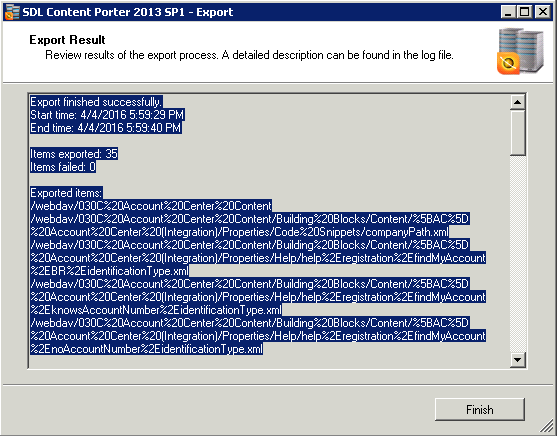 |
Importing Content in a release
Now that the release has been exported, we need to import it into the higher environment. We had exported all levels at one time, and we will import one level at a time.
Content Porter imports the items in an unpredictable order, and so this helps us reduce any dependency issues (of 050 on 030 for example).
This also ensures that we know that the scope of errors are the level that we have just imported. If there is an issue at 030, we know that we don’t have to look at 050.
| Â Open the Content Porter and select the Import Wizard | 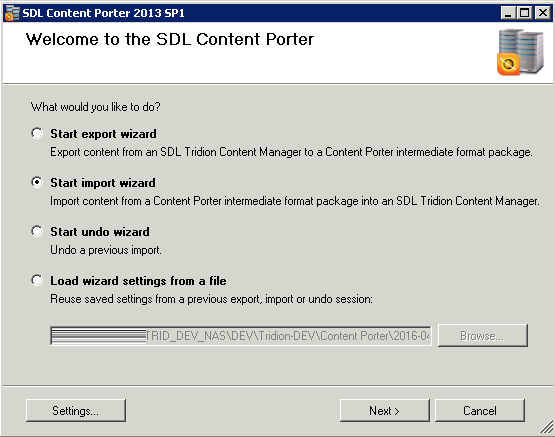 |
| Â Select the server that we will import to | Â 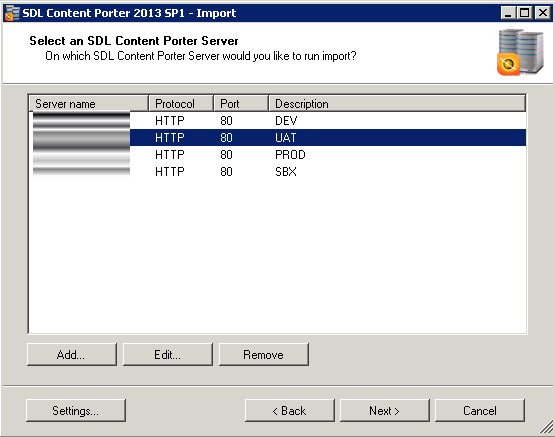 |
| Select the import file, and fill in the import description. The import description is important if we have an issue and want to undo the import later on. We name the import the same as the release and export file, and include the level that we import in to. | 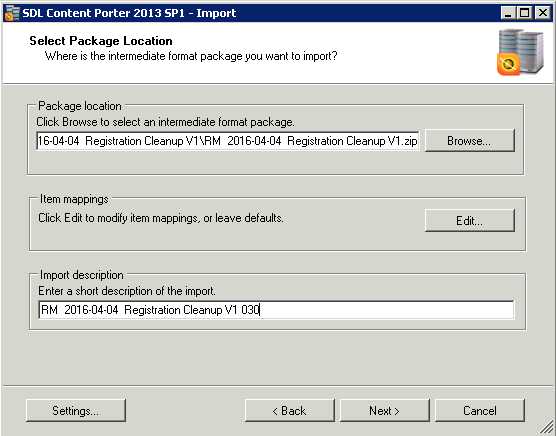 |
| Clear the Dependency Type GroupsWe have not exported any, and this will cause a higher level (050) to look back at a lower level (030) for content that it can’t find. We would rather have an error and then diagnose that. | 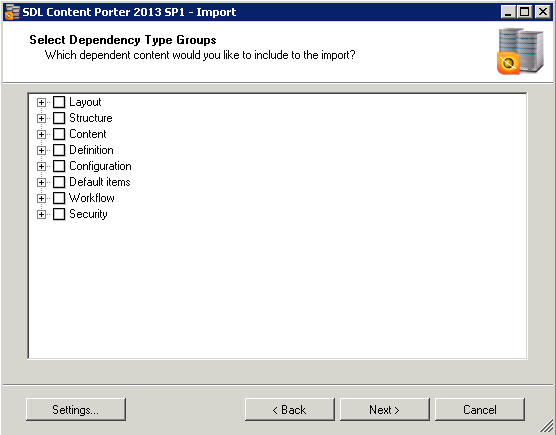 |
| Select the first level for which we have exported content – the level closest to the empty parent. In this case we have exported 030 and 050, so select 030. We also have 030 Content and 030 Design. Both of these are at the same level so we could select both of them at the same time. | 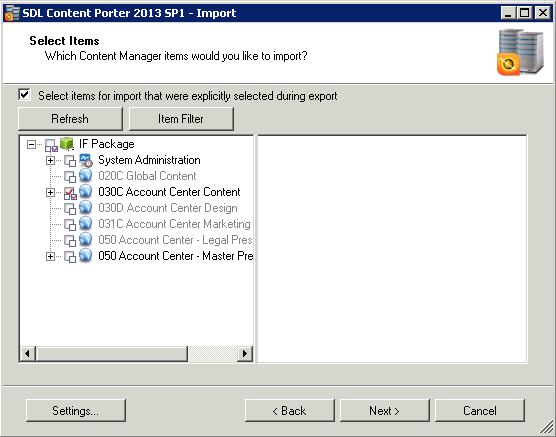 |
|
 |
| Skip errors. Complete the entire import, noting errors but not stopping on the first one. If the import completes with errors we can check the log and fix some or all of them. This log file gets overwritten with each import, so it’s helpful to have very granular imports. | 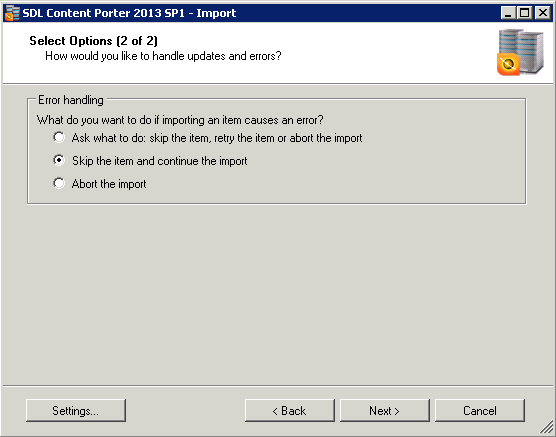 |
| Complete the import. It may or may not have errors. Correcting the errors will have to be the subject of another post. | 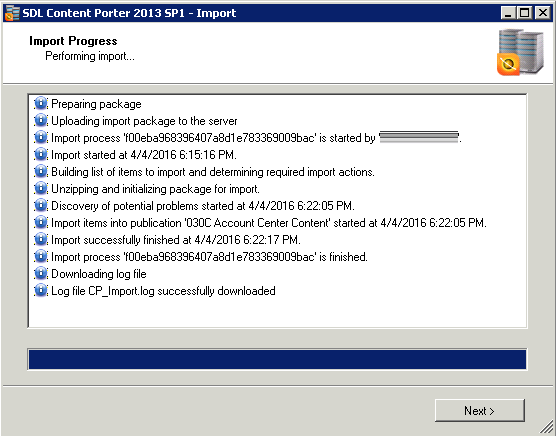 |
| Follow the same set of steps for the rest of the levels, one at a time. |   |
Conclusion
The Content Porter lets us move content and design from one Tridion instance to another. It has options available for many scenarios, and it can be an overwhelming tool. The scenario that I’m describing here is very limited in scope, where we have two environments that are nearly the same, and we want to migrate a known set of changes from to another. With these settings, you will reduce the number of errors with the migration, but also be able to diagnose the errors as easily as possible.
nice article Paul. Great to see it consolidated at one place in a single blog
Overall very solid, but I would advise not skipping errors. I have seen scenarios when you don’t fixed the issue and skip it, it will start importing various items in the child publication. When there’s dependencies, you may need to do a complete cleanup of the child item first (which could be extremely time consuming) before you can do import again
I’ve recommended skipping errors only in the middle of the porting, not altogether for a single content port. After the port of that level has finished, you should review and correct any errors that have come up. I’ve found it far easier to that en masse than inn the middle of the port. We are also turning off all dependencies on both the export and the import, and are importing a single level at a time, so there shouldn’t be any dependencies brought in, in any case. These recommendations are for a single limited scenario, where you have near identical environments. For other situations I absolutely agree with your points.
Very detailed post Paul! This should be helpful to many in similar situations.